How to run a Website


"For all my homies." - Techies
Editor's note: Claude wrote this one and I edited it. There's just so much to share. I've read and made minor edits to make it more me and less Opus 4.7.
You have a laptop collecting dust? You have opinions? You want a place on the internet that's yours — not an Instagram page, not a Substack, not a monthly subscription service — a domain, a computer, and something you own.
Good news: you already own most of what you need. This is basically how I did it.
The short version
- Check if your ISP lets you self-host.
- Buy a domain! It's cheaper than a burrito. I use Cloudflare.
- Wipe the machine. It's a server now.
- Install Docker and the basics.
- Sign up for Resend so Ghost can send email.
- Run Ghost behind Caddy with one
docker-compose.yml. - Forward ports 80 and 443 from your router to the laptop.
- Point DNS at your home IP in Cloudflare.
That's the map. It will take a while, but it's doable. Now the territory.
1. Can you actually self-host?
Before you do anything, check two things. If either of them goes sideways, you'll save yourself a weekend of debugging.
Do you have a real public IP?
Go to whatismyip.com and note the address it shows. Then log into your router's admin page (usually 192.168.1.1 or 192.168.0.1) and find the WAN IP.
If they match: you're good. You have a real public IP and the outside internet can, in principle, reach your house.
If they don't match: you're behind something called CGNAT — Carrier-Grade NAT. Your ISP is sharing one IP across a bunch of customers and port forwarding won't work. Common culprits: T-Mobile Home Internet, Starlink, most cellular backhaul, some rural fiber. Comcast/Xfinity residential is usually fine. Your mileage may vary, please check with your ISP.
Sidebar: what is CGNAT and why does it break this? The public internet has a fixed number of IPv4 addresses (about 4 billion) and we ran out years ago. ISPs cope by putting a bunch of customers behind one shared IP, the way your home router puts a bunch of devices behind one IP. It works great for outbound traffic — you can browse the web fine — but inbound connections hit the ISP's shared router and get dropped. Port forwarding on your router doesn't help because the ISP is the one deciding who gets the packets.
If you're stuck behind CGNAT, expand the "If you can't port forward" note at the bottom of step 7. Tunnels are a fine option and not a downgrade — just a different shape.
Does your ISP block port 80 or 443?
Some residential ISPs block these. Most don't. You'll find out when DNS is set up and the site either works or doesn't. If it doesn't, again: tunnel.
2. Buy a domain
Go to Cloudflare Registrar and buy the domain you want. Cloudflare sells domains at cost — no markup, no "first year $1 then $40" nonsense. You'll also want Cloudflare for DNS in step 8, so this keeps everything in one place.
Pick something you'll still like in three years. Short is nice. .com is still the default, but .dev, .site, .blog, and .xyz are all fine.
Sidebar: why own the domain? A domain is the one piece of this stack that's portable. If your laptop dies, if Ghost folds, if you switch from Ghost to Hugo to handwritten HTML — the domain goes with you. Everyone who links to yourname.com/posts/whatever keeps linking to you. That's what "owning your corner of the internet" actually means in practice: the URL is the primary key.3. Wipe the laptop
Back up anything you want to keep — photos, documents, the whole Downloads folder full of PDFs you'll never read again. Time Machine to an external drive is the easy path. Once it's backed up:
- Shut the laptop down.
- Boot into Recovery Mode:
- Intel Mac: hold
Cmd + Rat startup. - Apple Silicon (M1/M2/M3): hold the power button until you see "Loading startup options."
- Intel Mac: hold
- Open Disk Utility, erase the internal drive (APFS, GUID partition map).
- Quit Disk Utility and choose "Reinstall macOS."
- Go make coffee.
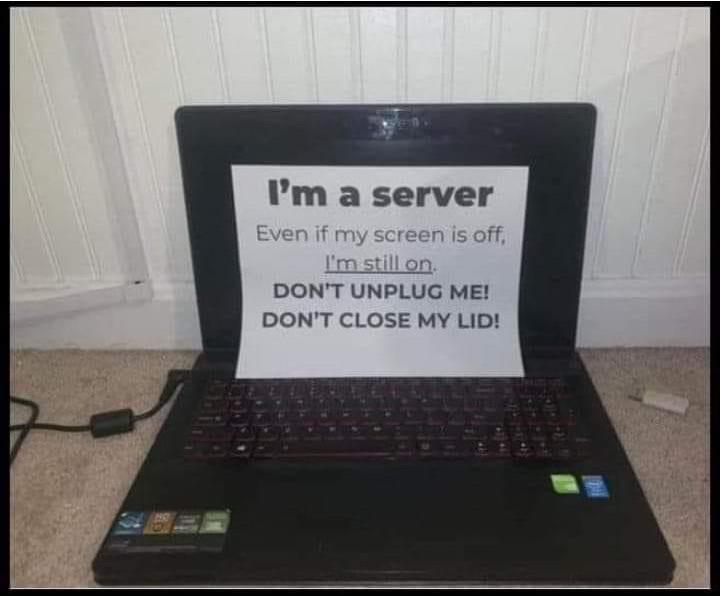
When it finishes, set up a new local account. Don't sign into iCloud — this is a server now, not a personal device. Give it a memorable hostname in System Settings → General → About. You're naming the server. I treat it like a pet. The name is what'll show up on your network.
Sidebar: why wipe it? Two reasons. First, you don't want your old browser sessions, cached passwords, and iCloud sync running on a machine that's now exposed to the internet. Second, a clean install means you know exactly what's on it. Every piece of software is something that can break or get exploited — starting from zero means the attack surface is only the stuff you intentionally put there.
Keep it awake
A laptop with the lid closed will sleep by default, and a sleeping server serves nothing. Two fixes:
- System Settings → Battery → Options: set "Prevent automatic sleeping on power adapter when the display is off" to on.
- Or, in Terminal: run
caffeinate -d -i -sand leave that terminal open. Cruder, but it works. It's what I would probably start with.
Also, plug it in. A laptop battery cycling 24/7 will die in a year. If you can, plug it into an uninterruptible power supply (UPS) so a flickering power outage doesn't take the site down.

4. Install the tools
Open Terminal. Install Homebrew first — it's a way to download other programs. Copy and paste this into the terminal and press enter:
/bin/bash -c "$(curl -fsSL https://raw.githubusercontent.com/Homebrew/install/HEAD/install.sh)"
Then install Docker Desktop:
brew install --cask docker
Launch Docker Desktop once from Applications so it can do its first-run setup. Accept the permissions. You should see a little whale icon in your menu bar when it's running.
Verify it works:
docker --version
docker compose version
Both should print version numbers. If they don't, Docker Desktop isn't fully started yet — give it a minute.
Sidebar: why Docker? Ghost is a Node.js app that needs a specific Node version, a specific database driver, and a specific set of dependencies. Caddy is a Go binary with its own config. Running both directly on macOS means managing all of that yourself, and when you upgrade macOS in two years, something will break.
Docker wraps each of these in a container — a tiny self-contained environment with exactly the right versions of everything. You describe what you want in adocker-compose.ymlfile, and Docker makes it happen. When Ghost releases a new version, you change one line and rundocker compose up -d. When the laptop dies, you copy the compose file to a new machine and you're running again in ten minutes.
It's the closest thing to "infrastructure as a text file" that exists for one-person setups. It's not perfect, but it's simple.
5. Set up email with Resend
Ghost needs to send email. Not "might eventually want to" — needs to, before you can even create the first admin user. The verification link gets emailed to you, and if Ghost can't send, you sit at a stuck setup screen forever. Ask me how I know.
Cloudflare technically has an email sending service now, but it's designed to be called from Cloudflare Workers, not as a plain SMTP endpoint. Not a fit here. What works cleanly with Ghost is Resend — developer-friendly, 3,000 emails/month free, gives you real SMTP credentials that drop straight into the compose file.
Sign up and verify your domain
- Sign up at resend.com.
- Click Domains → Add Domain and enter your domain (the one you bought in step 2).
- Resend shows you a handful of DNS records — MX, TXT for SPF, TXT for DKIM, and a TXT for DMARC.
- Go to your Cloudflare DNS dashboard and add each one exactly as shown. Set the proxy status to "DNS only" (grey cloud) for all mail-related records — email doesn't go through Cloudflare's HTTP proxy.
- Back in Resend, click Verify DNS Records. It may take a minute or two. When every row shows green, you're good.
Grab an API key
Resend gives you both an HTTP API and SMTP credentials. Ghost wants SMTP.
- Go to API Keys → Create API Key.
- Name it something like
ghost-smtp, give it "Sending access" permission. - Copy the key immediately — Resend only shows it to you once. Save it somewhere you'll find it again in ten minutes.
Your SMTP credentials are:
- Host:
smtp.resend.com - Port:
465(TLS) - Username:
resend - Password: the API key you just created
Sidebar: why do I need a whole separate service just to send email? Because residential ISPs blacklist their own customers for sending email, and every major inbox provider (Gmail, Outlook, Yahoo) aggressively rejects mail from home IPs. Even if you got it working, half your emails would land in spam. Transactional email providers like Resend maintain clean sending IPs, handle SPF/DKIM/DMARC signing, and have relationships with inbox providers that your basement doesn't. You could run your own mail server, but it's the single hardest piece of self-hosted infrastructure. Not on day one.
6. The docker-compose.yml that does all the hard work
We're still in the terminal. Make a folder/directory for your server.
mkdir -p ~/server && cd ~/server
Next we'll create a new file using nano, a text editor that ships with macOS. It'll do all the heavy lifting.
nano docker-compose.yml
Below is the example. Copy/paste it into the nano session in your terminal. Make sure to follow the ToDo comments and replace yourdomain.com and the Resend API key. Feel free to remove the ToDo comments once you're all set.
To exit nano and save your file, press Control+X, then Y, and Return/Enter. You've successfully created the config. You could also do all of this using Visual Studio Code or something. Up to you.
services:
  ghost:
    image: ghost:5-alpine
    restart: always
    environment:
      url: https://yourdomain.com # ToDo: replace with your domain
      NODE_ENV: production
      mail__transport: SMTP
      mail__options__host: smtp.resend.com
      mail__options__port: 465
      mail__options__secure: "true"
      mail__options__auth__user: resend
      mail__options__auth__pass: re_YOUR_API_KEY_HERE # ToDo: paste your Resend API key
      mail__from: '"Your Name" <[email protected]>' # ToDo: replace with your info
    volumes:
      - ghost-content:/var/lib/ghost/content
    expose:
      - "2368"

  caddy:
    image: caddy:2-alpine
    restart: always
    ports:
      - "80:80"
      - "443:443"
    volumes:
      - ./Caddyfile:/etc/caddy/Caddyfile
      - caddy-data:/data
      - caddy-config:/config
    depends_on:
      - ghost

volumes:
  ghost-content:
  caddy-data:
  caddy-config:
A few notes on the mail config:
- The
__(double underscore) is how Ghost's config library turns environment variables into nested JSON config.mail__options__hostbecomesmail.options.host. It looks weird. It works. mail__frommust be an email address on the domain you verified with Resend. If you verifiedyourdomain.com, then[email protected]works.[email protected]will get rejected.- Keep the API key out of any public git repo. If you ever commit this file, move the key into a
.envfile and reference it as${RESEND_API_KEY}instead. For a single-laptop setup that never leaves the laptop, hardcoding is fine.
Create the Caddyfile in the same folder/directory, doing the same steps we just did for the docker-compose.yml:
nano Caddyfile
yourdomain.com, www.yourdomain.com {
    reverse_proxy ghost:2368
    encode gzip
}
Replace yourdomain.com with your actual domain. Don't skip the www. variant — people will type it, and you want both to work.
Bring it up using the following command in the terminal:
docker compose up -d
Wait thirty seconds, then check it's running:
docker compose ps
You should see ghost and caddy both in the running state. Ghost takes a moment on first boot while it sets up its SQLite database.
If you use this command, you should get Ghost's HTML:
curl -H "Host: yourdomain.com" http://localhost
It won't work from the outside internet yet — we haven't done ports or DNS — but the stack is alive.
Test email before moving on
Open http://localhost:2368/ghost in a browser on the laptop itself. You'll hit the first-user setup screen. Enter your name, a real email you can check, and a password. If Resend is wired up right, the verification email lands in your inbox within a few seconds and you can finish setup.
If it doesn't arrive:
- Check
docker compose logs ghostfor mail errors. "Invalid login" means the API key is wrong. "Domain not verified" means Resend's DNS check hasn't passed yet. - Check the Resend dashboard → Logs. You'll see every email attempt, including why it failed.
- Check your spam folder. First email from a new domain sometimes lands there; mark it "not spam" and future ones will be fine.
Don't skip this — if email is broken now, it's broken forever, and you'll lose half a day trying to figure out why password resets don't work six months from now.
Sidebar: what is Caddy doing here? Caddy is a reverse proxy. The name is confusing because it sounds backwards. Here's what it means: a regular proxy sits in front of you (the client) and forwards your outbound requests to the internet. A reverse proxy sits in front of a server and receives inbound requests on its behalf.
Why have one at all? Two reasons:
1. TLS. Ghost speaks HTTP. The modern web requires HTTPS. Caddy terminates the TLS connection — it handles all the certificate stuff, decrypts the request, and hands plain HTTP to Ghost on an internal Docker network. Ghost doesn't need to know TLS exists. This is huge because Caddy's killer feature is that it gets certificates from Let's Encrypt automatically. You put a domain in the Caddyfile and it just works. No certbot, no cron jobs, no renewal scripts.
2. Routing. If you ever add a second service — say, a paperless-ngx instance atdocs.yourdomain.com— you add three lines to the Caddyfile and Caddy handles it. One public IP, many services.
People often use nginx for this. Nginx was fine for a long time. Caddy is just friendlier.
7. Port forwarding
Your laptop is running Ghost behind Caddy, but the laptop is on your home network — 192.168.1.something. The internet can't reach 192.168.1.anything; those addresses are private. Your router has one public IP, and right now it's dropping all inbound connections because it doesn't know what to do with them.
Port forwarding is how you tell the router: "when a request comes in on port 443, send it to the laptop."
Find the laptop's local IP
ipconfig getifaddr en0   # Wi-Fi
ipconfig getifaddr en1   # wired, if you're on ethernet
Write this down. You want the laptop to always have this IP, so also go into your router's admin and find the DHCP reservation (sometimes called "static lease" or "address reservation") settings. Tell the router: this MAC address always gets this IP. Otherwise the router might hand out a different IP next week and port forwarding will break.
Forward the ports
In your router admin, find Port Forwarding (sometimes under "Advanced" or "NAT"). Create two rules:
| External Port | Internal IP | Internal Port | Protocol |
|---|---|---|---|
| 80 | laptop's IP | 80 | TCP |
| 443 | laptop's IP | 443 | TCP |
Save. Reboot the router if it tells you to.
Sidebar: why these two ports? Port 80 is HTTP. Port 443 is HTTPS. When someone typesyourdomain.comin a browser, the browser defaults to port 80, gets a redirect from Caddy to HTTPS, and reconnects on 443. Both ports need to reach your laptop for this to work.
Port 80 also matters for Let's Encrypt — that's how Caddy proves to them that it actually controls your domain, so they'll issue it a certificate. If port 80 is blocked by your ISP, you can tell Caddy to use the DNS challenge instead (via Cloudflare's API) but that's a later essay.
Do not forward anything else
The whole point of the reverse proxy is that 80 and 443 are the only doors to the outside world. Everything else — SSH for admin, Ghost's admin panel, anything you add later — stays on your home network or on Tailscale/ZeroTier/whatever you use to reach your home network from the road.
If you can't port forward (CGNAT, blocked ports, etc.)
If step 1 showed you're behind CGNAT, or your ISP blocks ports 80/443, you can't port forward. You need to invert the connection: instead of the internet reaching in, your server reaches out.
Cloudflare Tunnel is the easiest version of this. You install a small daemon (cloudflared) on the laptop, it opens a persistent outbound connection to Cloudflare's edge, and Cloudflare routes traffic for your domain through that tunnel to your laptop. No port forwarding, no public IP needed, works from behind any NAT.
Rough steps (full guide is in Cloudflare's docs):
- In the Cloudflare dashboard, go to Zero Trust → Networks → Tunnels and create a tunnel.
- Copy the install command it gives you and run it on the laptop.
- Add a public hostname route:
yourdomain.com→http://localhost:80(where Caddy is listening). - Skip step 8 below — the tunnel creates its own CNAME automatically.
Other options with basically the same shape: Tailscale Funnel, ngrok, Pangolin, frp. They all solve the same problem. Cloudflare Tunnel is free and integrates with the dashboard you're already using, which is why I'd start there.
8. DNS in Cloudflare
Almost there. Right now, yourdomain.com doesn't point anywhere. You own it but it has no address. Time to fix that.
Go to dash.cloudflare.com, click your domain, go to DNS → Records.
Add two records:
| Type | Name | Content | Proxy status |
|---|---|---|---|
| A | @ | your public IP | Proxied (orange) |
| A | www | your public IP | Proxied (orange) |
Your public IP is what whatismyip.com showed you back in step 1.
Turn on the orange cloud (proxied) for both records. This routes traffic through Cloudflare's CDN before it hits your house, which gets you DDoS protection, caching at the edge, and hides your home IP from the open internet. All good things for a server running in your basement.
Wait a couple minutes for DNS to propagate, then visit https://yourdomain.com in a browser. You should see the Ghost welcome page.
If you see a cert warning or a redirect loop, switch the records to "DNS only" (grey cloud) temporarily, wait for Caddy to finish getting its Let's Encrypt cert (docker compose logs caddy will show this), then flip back to orange. Cloudflare and Caddy both want to manage TLS, and they need a minute to agree on who's doing what.
If you see a connection timeout, either your port forward isn't working or your ISP is blocking port 443. Check docker compose logs caddy for hints.
Sidebar: DNS is a phone book DNS (Domain Name System) is howyourdomain.combecomes the IP address a browser can actually connect to. Every time anyone anywhere visits your site, their computer asks a DNS resolver "hey, what's the IP for yourdomain.com?" — the resolver asks Cloudflare (because you bought the domain there), and Cloudflare says "it's 73.x.x.x" — the browser connects to that IP, which is your home router, which forwards to your laptop, which gives the browser Ghost's HTML.
That whole chain happens in under 100 milliseconds. It's one of the genuinely magical pieces of infrastructure the internet is built on.
Your home router's IP might change
Residential ISPs rotate public IPs occasionally — usually when the modem reboots, sometimes more often. If your IP changes, the DNS record is stale and the site goes down until you update it.
Fix: run a dynamic DNS updater. Cloudflare has an API; there's a well-maintained Docker image called oznu/cloudflare-ddns that you can add to your compose file:
  cloudflare-ddns:
    image: oznu/cloudflare-ddns:latest
    restart: always
    environment:
      - API_KEY=your-cloudflare-api-token
      - ZONE=yourdomain.com
      - PROXIED=true
It polls your public IP every few minutes and updates the Cloudflare record if it's changed. Set this up once and forget it.
Things to do next
- Backups. Ghost's state is all in the
ghost-contentvolume. Cron a nightlydocker run --rm -v ghost-content:/data -v $(pwd)/backups:/backup alpine tar czf /backup/ghost-$(date +%F).tar.gz -C /data .and copy it somewhere off the laptop. If the SSD dies and you have no backup, you lose everything. Don't be the person who finds this out the hard way. - SSH keys, not passwords. If you SSH into the laptop from other machines on your LAN, use key-based auth and disable password auth. Even on LAN-only.
- Firewall. macOS has one built in (System Settings → Network → Firewall). Make sure it is on. The only ports that should accept connections are the ones Docker opens.
- Watch the logs for a week.
docker compose logs -fin the server directory. You'll see every request. It's informative and slightly horrifying — the amount of automated scanning traffic the internet fires at any new IP is a lot.
Why any of this
You could have used Substack. You could have used Ghost's hosted service. Both would've taken ten minutes instead of an afternoon.
The difference is that in a year — or five — when Substack changes its policy, or Ghost raises prices, or any of a dozen platforms decides your content isn't the kind they want to host anymore — you'd be moving. With this setup, you're not renting. Your domain is yours, your data is yours, the machine is in your house. The worst anyone can do is make you change registrars, and Cloudflare hasn't given me a reason to worry about that yet. Someday, you could try using their new CMS Emdash instead of Ghost. Maybe they can make hosting costs drop below the energy bill of that laptop.
Owning your corner of the internet isn't a slogan. It's a repurposed old laptop, a raspberry pi, an old gaming computer.